

Before you begin
A scene with dialogue and reviewed character and Location sheets, Cast Voices for each speaker, and a working Blender installation, which the agent checks before rendering.
What you’ll do
A Previs Shot Plan whose cameras cut to whoever is speaking, timed to the dialogue takes you selected, and a generated take that follows it.
Start with the dialogue takes
In a dialogue scene the performance sets the timing. With selected dialogue takes, the previs is timed to real line lengths and pauses. Without them it uses estimated timing, which is fine for a first blocking pass; Basilica’s first pass was made that way and the audio came in later revisions.
- Open the scene and ask for dialogue takes for the Turns you want to stage. The Media Producer skill uses the screenplay and each speaker’s Cast Voice.
- Listen in Studio and select the takes you want to keep. The previs times its cues to the selected audio and does not stretch it.
Ask for a first blocking pass
The Blender Shot Planner skill builds the room from the Location sheet and places proxies for each character from their sheets. A first pass is a starting point for directing, not a finished plan.
- Ask for a Blender previs of the scene, naming the Turns it should cover. Describe any staging you already have in mind, such as where each character sits.
- Watch the render in Studio. Judge the geography first: who is where, which side of the table the windows are on, and whether the master shot reads clearly.
Create a Blender previs for dialogue Turns 2–5 of this scene. Keep a symmetrical wide master down the length of the table.
Direct who is seen while speaking
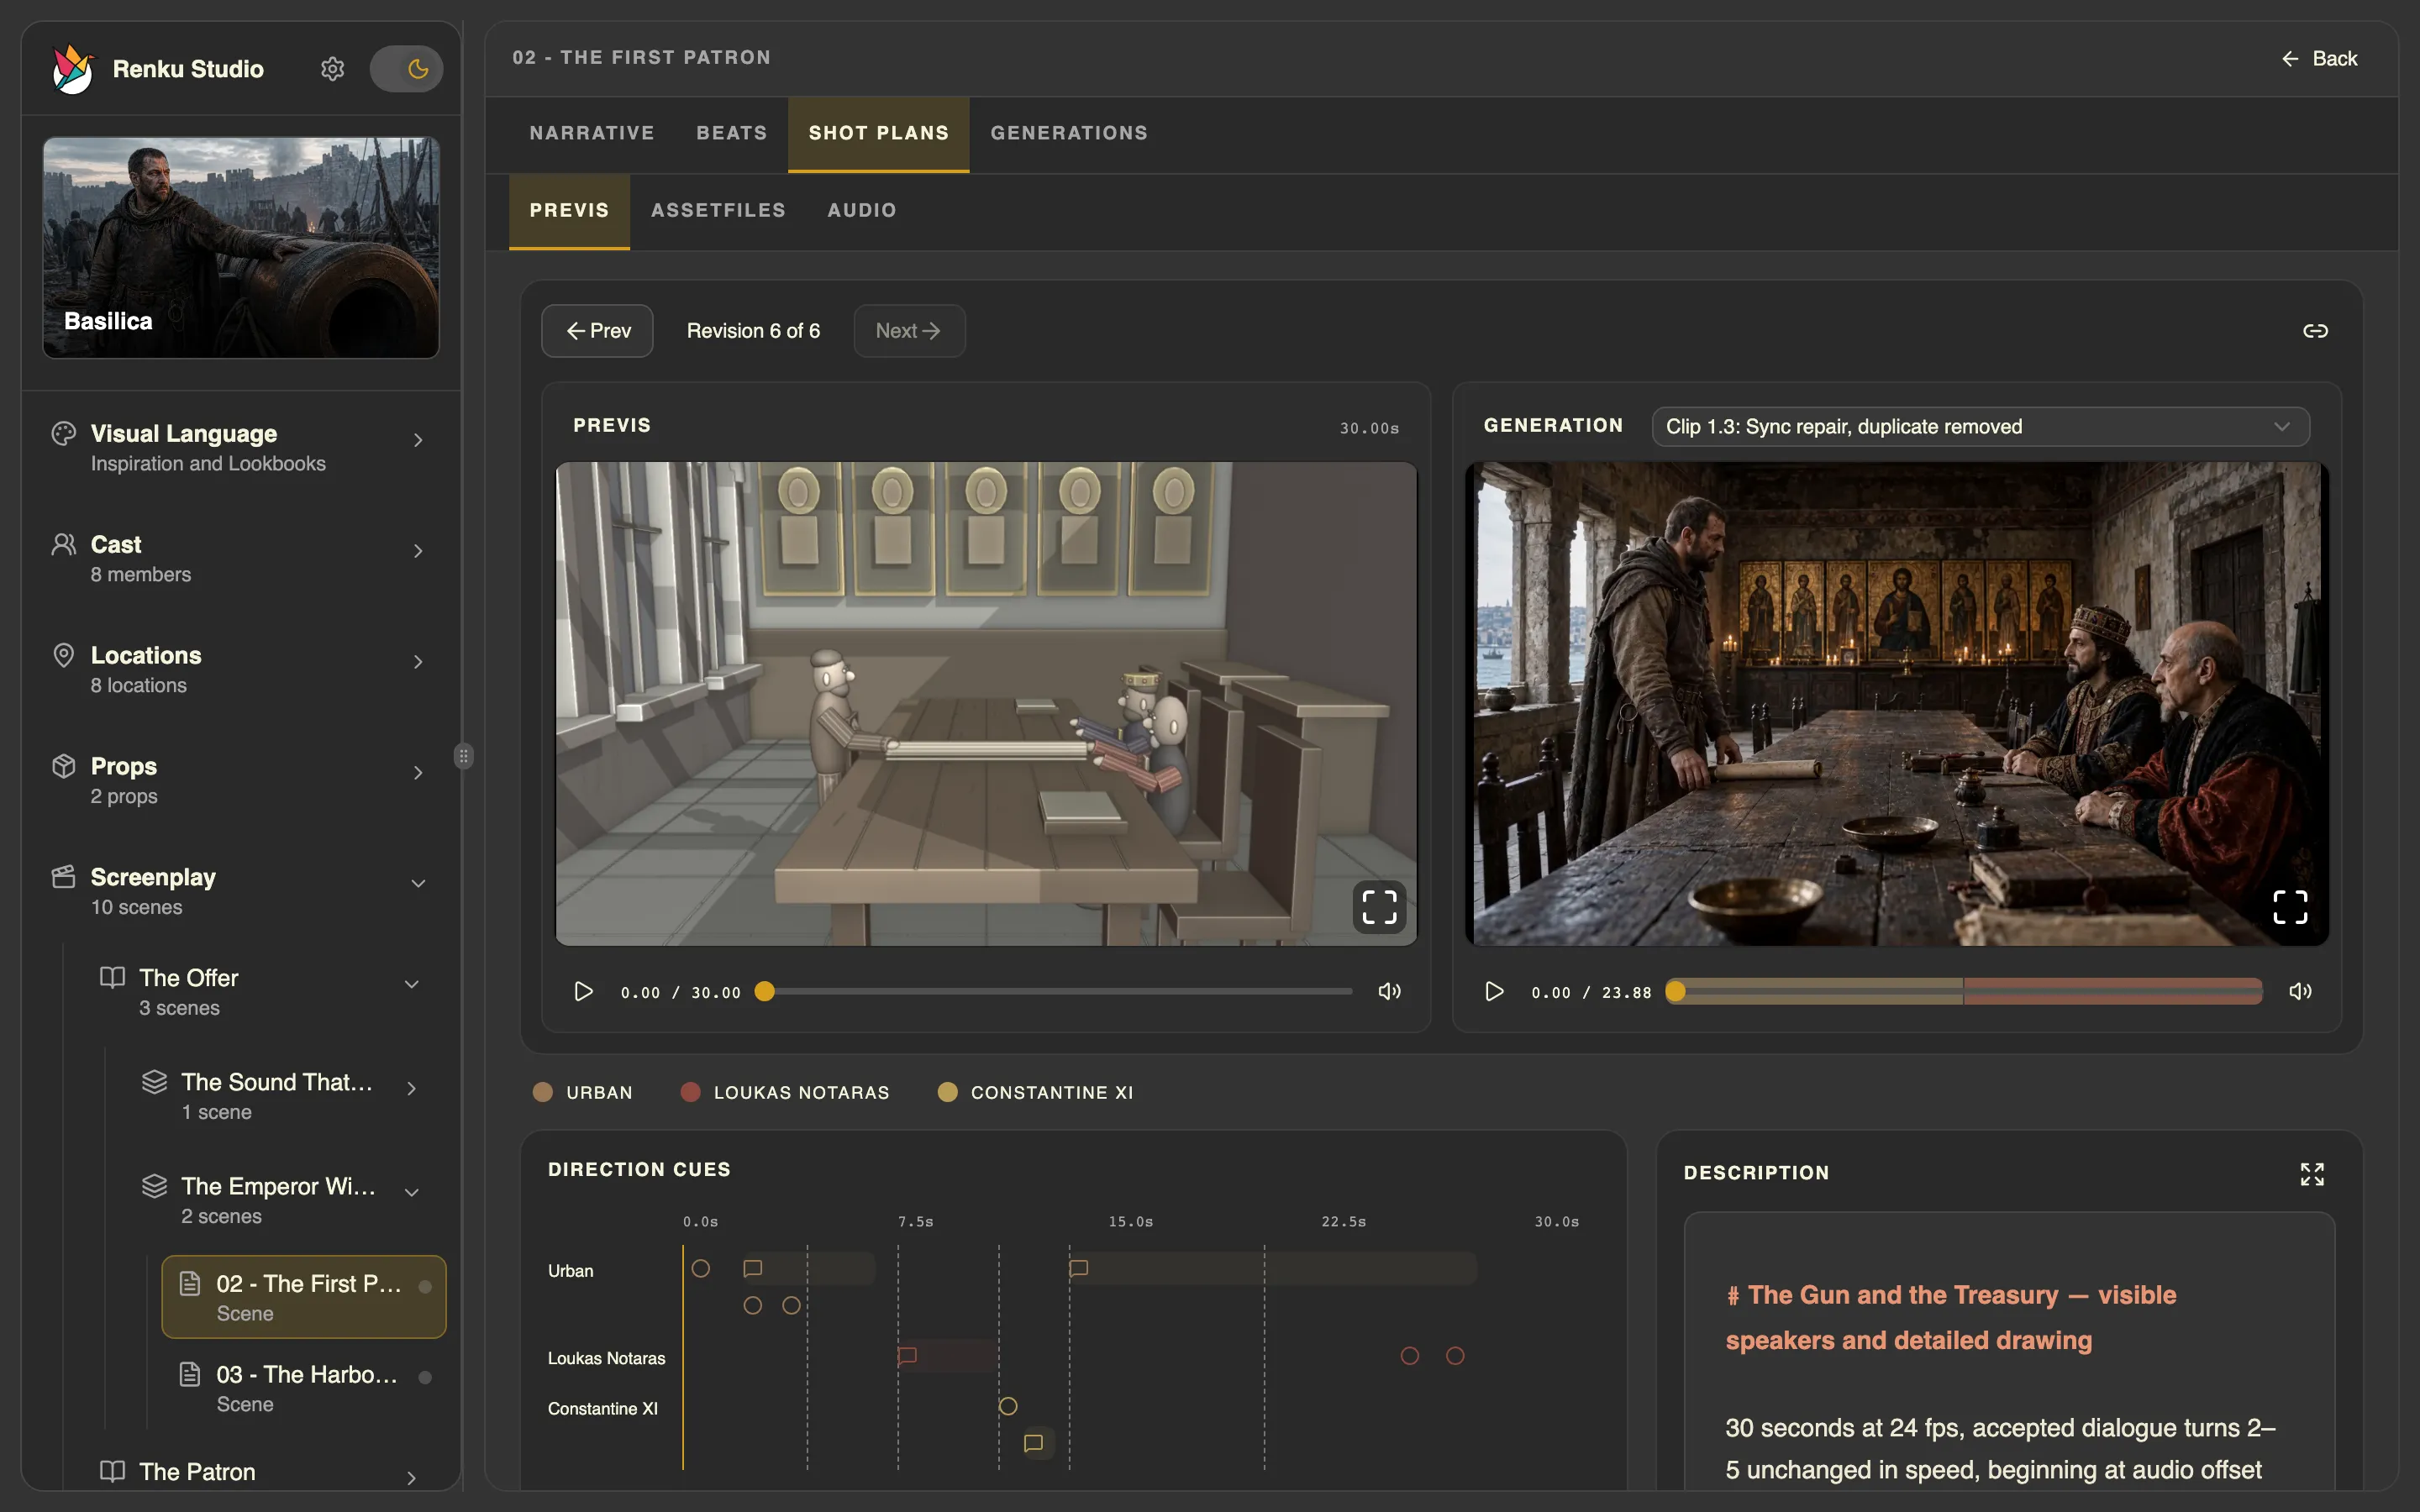
The first Basilica pass was silent and 34 seconds long, with provisional line timing. The emperor’s question was heard off-screen over Urban’s reaction, and the drawing was a simple schematic. Over five more revisions it became a 30-second plan timed to the selected dialogue, with Constantine seen asking his question and a detailed drawing in the insert.
- Name the line and the change, in ordinary words: who should be on screen, when to cut, and what should stay the same.
- Refer to the actual line or Turn rather than a timecode. The agent resolves the exact line, times the cue to the selected audio, and records it in the plan.
- Review each new render. Every completed revision is kept, and you can step back through them in Studio.
Cut to Constantine in close-up when he asks “What would you require?”, then cut to Urban for his list. Keep the opening wide and the rest of the timing unchanged.
Watch the reviewed revision
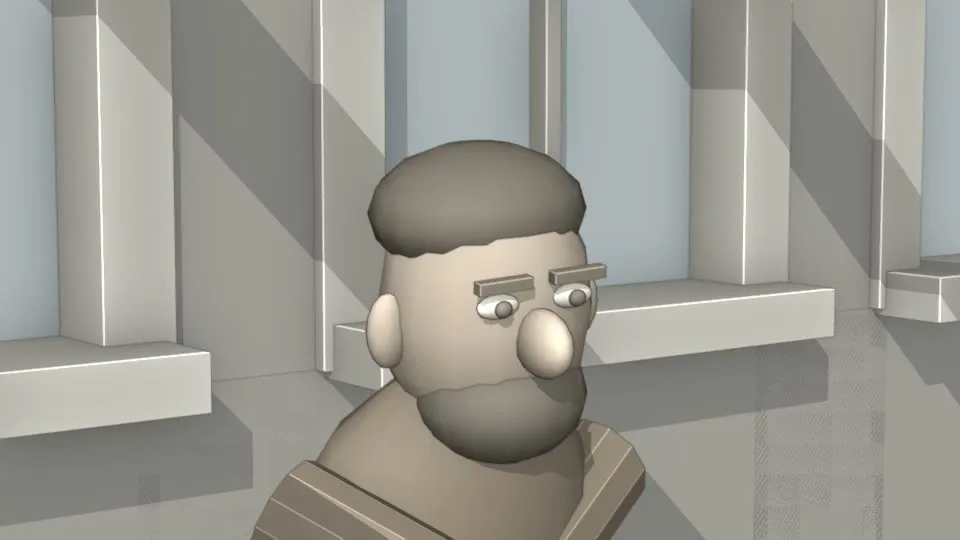
Revision 6 runs 30 seconds with the selected dialogue. It opens wide, inserts the drawing, cuts to each speaker in turn, and returns to the wide for the end of Urban’s list.
Blender previs, revision 6
Hand it to video generation
When you ask for a video, Blender Shot Planner hands the reviewed revision to the Media Producer skill. The previs controls motion, camera and timing; the character and Location sheets control appearance.
- Ask for a video of the reviewed revision and check the generation preview before any paid request.
- Review each take against the previs. AI video follows the previs as a reference; it does not reproduce motion or speech timing exactly.
- Ask for a new take, or a focused repair, when a cut or a line lands in the wrong place.
Generate a video from previs revision 6. Show me the generation preview before generating.
A 30-second previs becomes two clips
The video model used here makes at most 15 seconds per request, so Media Producer splits a longer previs into consecutive clips. Here, Clip 1 covers the first 15 seconds. Clip 2 starts from the actual last frame of Clip 1 and covers the rest, so the picture carries on without a jump. Studio keeps every take of every clip and plays the selected take of each one back to back beside the previs, so you judge the whole scene at once, not one clip at a time.
- In Studio, the Generation menu lists every take of every clip: Clip 1.1 to 1.3 are three takes of the first clip, and Clip 2.1 is the take of the second.
- The bar under the video has one colored part per clip. Playback runs through both, here 23.9 seconds in total.
- In both selected takes the model said one line twice. The agent cut out the repeat, keeping picture and sound together and without speeding anything up, which is why the two clips add up to less than the 30-second previs.
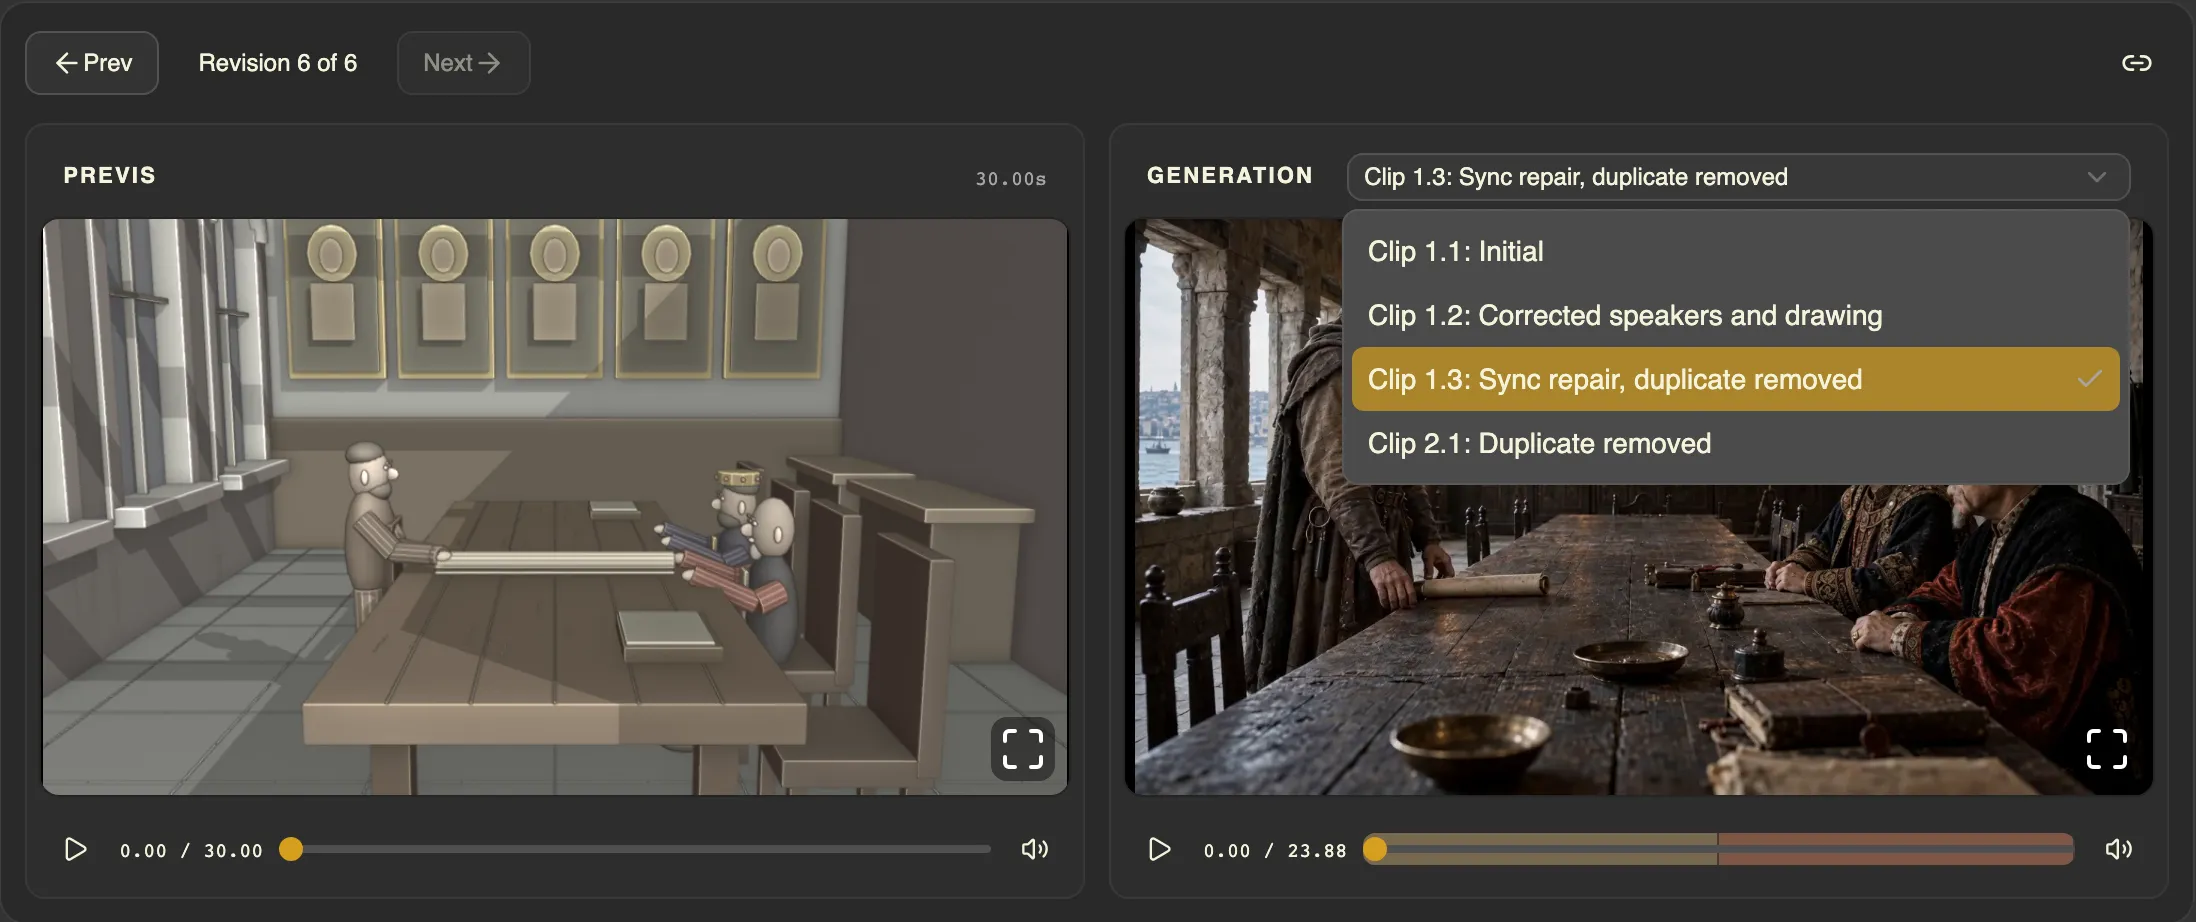
Both clips, played back to back
Before you finish
The previs shows each speaker when they talk, its cues match the selected dialogue, and you have watched the selected take of every clip back to back against the revision they came from. Both clips here were generated with MiniMax H3 Max on fal.ai, picture and sound together.