

Before you begin
A reviewed scene and visual context. The Blender workflow also requires a working Blender installation, which Codex should check before rendering.
What you’ll make
A Previs Shot Plan with reviewed blocking, camera direction, and a retained render for generation reference.
Create a Blender previs
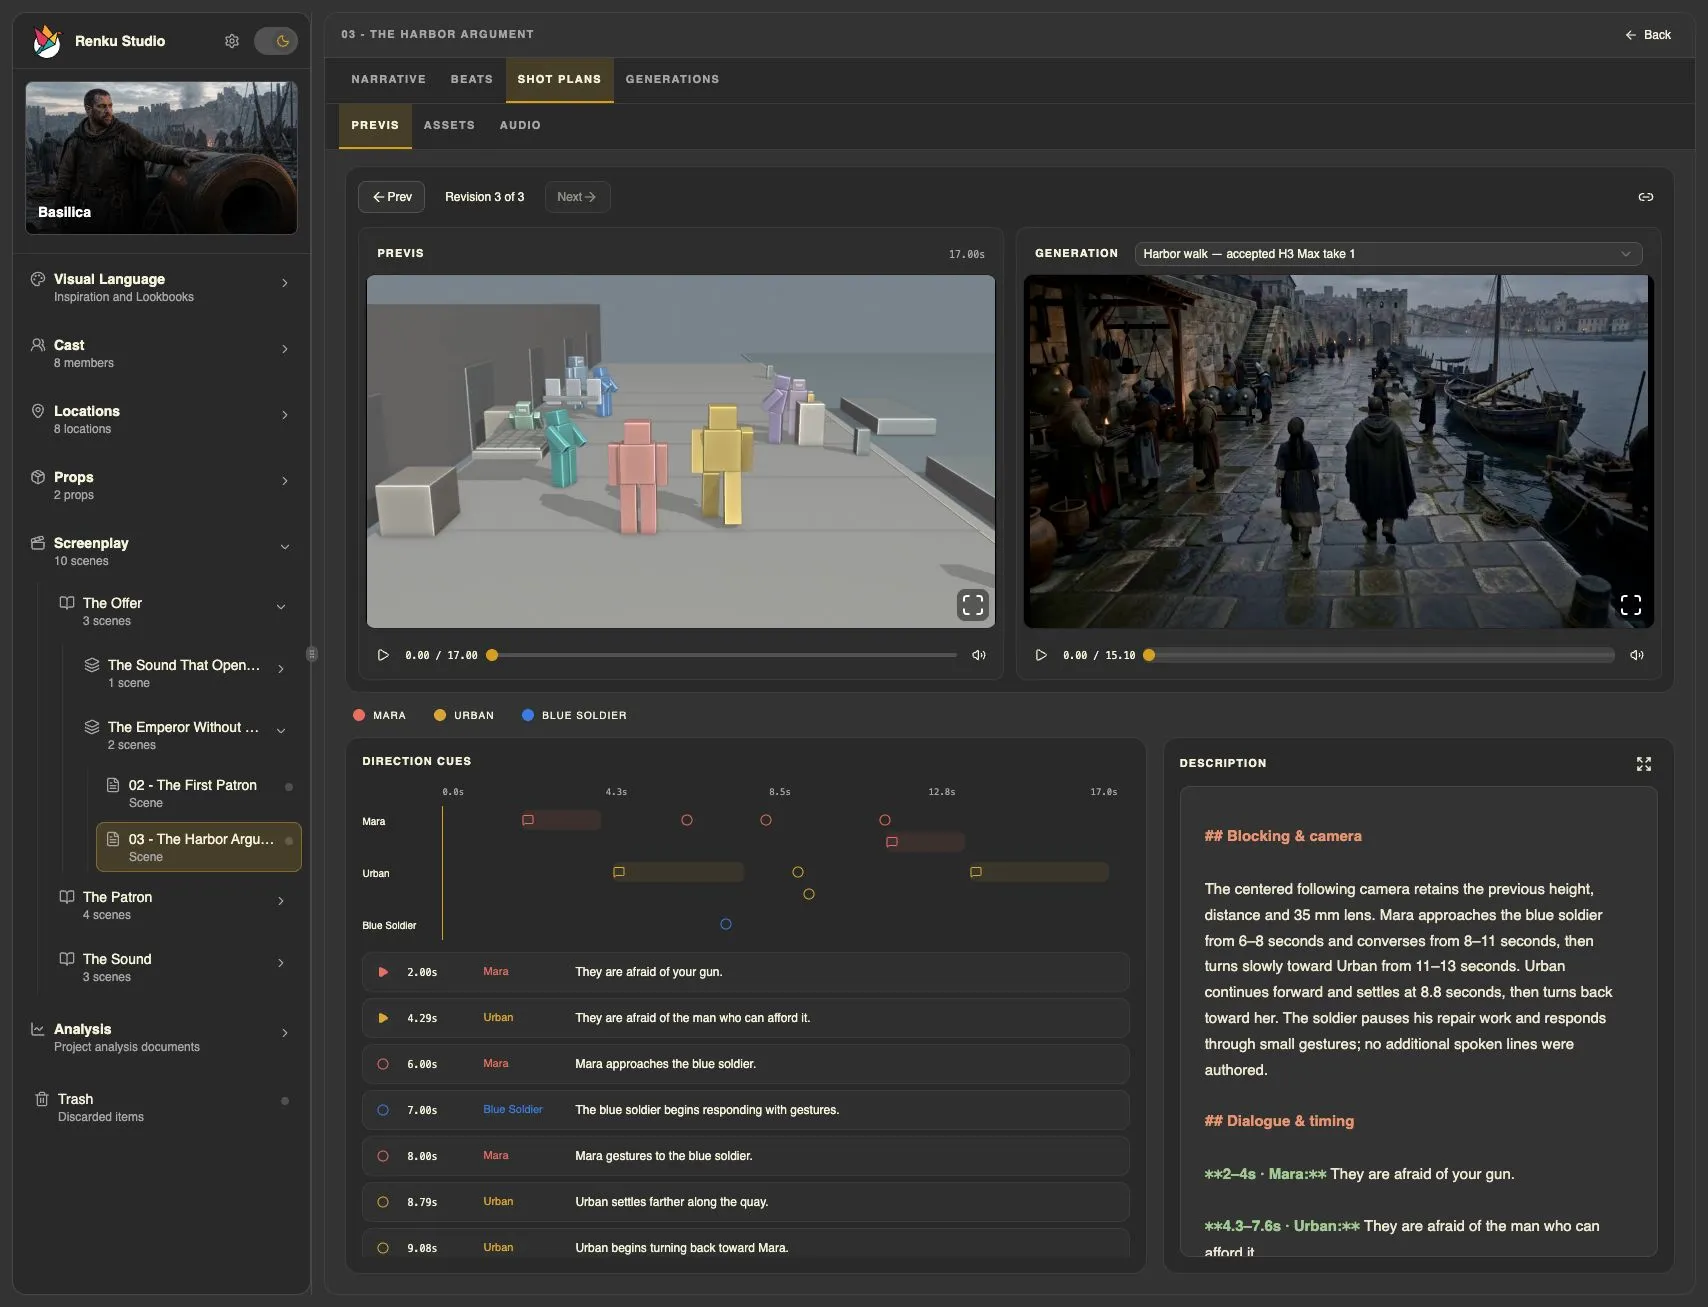
The Blender Shot Planner skill creates a Previs Shot Plan using the scene, active Beats, and relevant character, Location, and Prop sheets. It builds a moving Blender rehearsal, reviews renders, and retains the source and completed render revisions.
- Open the scene and ask for a Blender previs. You can choose this approach without creating a Shot List first.
- Describe any staging or camera ideas you have. The skill translates your direction into scene-specific controls for positions, cameras, timing, and performance, and asks when an ambiguous spatial choice matters.
- Watch the render in Studio. Judge the geography, action, and camera intent before moving on to an AI interpretation.
Create a Blender previs for the current scene. Start wide and move closer as the exchange becomes more tense.
Refine the motion and timing
Blender Shot Planner continues the existing plan when you give feedback. It updates the staging, timing, and complete scene description together, checks the rendered motion, and registers a new completed revision.
- Watch the previs and identify the subject, moment, or camera move you want to change. Distinguish screen-left from the character’s left when it matters.
- Give concrete direction in ordinary language. For dialogue timing, refer to the actual line or turn in your screenplay.
- Review the new render in Studio. When you ask for AI video, Blender Shot Planner hands the chosen revision to Media Producer; you do not need to manage the revision files yourself.
Hold the opening wide shot for two seconds longer, then move closer. Keep the character positions and the rest of the action unchanged.
See the workflow
From rehearsal to interpretation.
Watch the harbor previs, then its generated cinematic take. Compare the staging and camera intent across both.
Blender Previs
Generated take
Before moving on
The previs communicates the intended geography, movement, and timing. You have reviewed the actual render and identified the revision to use for a generated take.
For scenes with dialogue, generate and select the Shot Plan’s audio takes before preparing video.